Anyways! Onto the nails :) Previously, I was behind on the 52 Week Challenge, but now I am finally up to date :) Since I haven't posted in a while, I just decided to let everyone see what I've done over the last couple weeks all at once. So enjoy!
 |
| Week 9: Rainbow |
 |
| Week 7: Black and White |
 |
| Week 8: Saran Wrap |
Week 7: Greyscale Marble (Black and White)


So, for week 7, I decided to do a greyscale scale marble (grey can count as black/white too, right?). I don't do watermarbling very often because it is time-consuming and very messy, but the final product is definitely unique! I painted a white base using 2 coats of Wet N' Wild White Cream in hopes of making the colors of the marbling pop, but I'm kind of sad because the black ended up looking more like brown, and the grey kind of blends into the white. Oh well, I tried.
I usually have a lot of trouble water-marbling (hence this is only the second successful marble I've done), but I find a few tips to be especially helpful:
- Use filtered, room-temperature water. This ensures that the polish will spread evenly. I usually let the water sit for 30 minutes before I use it.
- Tape up the area around your nail before beginning. This ensures that you have the least clean-up to do.
- Don't drop the polish too fast into the water, otherwise it just goes straight to the bottom of the cup.
- Before dragging your design, drag an edge of the polish and adhere it to your cup. This way, your drops of polish don't go floating all over the place!
I hope these tips help you do a successful water-marble! It's not an easy technique, but the results are worth it!
Polishes Used:
China Glaze - Snow
China Glaze - Liquid Leather
Zoya - Dove
Week 8: Orange with Bronze Marbling (Saran Wrap)


For week 8 (and Thanksgiving), I did a saran wrap mani with an orange base and dabbed on a bronze on top. I can't say I really like this color combination, but it gives ordinary orange nails (are orange nails actually that ordinary?) a little bling!
I know a lot of tutorials tell you to paint a layer of your desired marbled color (in my case, bronze) over your base color AND THEN dab the saran wrap on top of the still-wet polish. However, this method doesn't work as well for me, as shown in my regal marble. Because of my previous experience, I decided to paint bronze onto the saran wrap and then dab the saran wrap onto my nails. I like the results of this method more, but experiment to see what works best for you :)
Colors Used:
Zoya - Arizona
Zoya - Richelle
Week 9 (current week): Pastel Rainbow

For this mani, I painted 1 coat of Wet N' Wild White Cream as a base to attempt to make the colors stand out more. For the pink, I mixed Shelby and the same white cream. I did the same for orange, using Arizona. All the other colors are straight from the bottles. For the gradient, I paint two lines of the colors I want next to each other on a makeup sponge, then dab the sponge on the nail to create the gradient. The only problem I have with this method is pulling off the polish you already have on the nail, but it wasn't so bad this time, luckily.
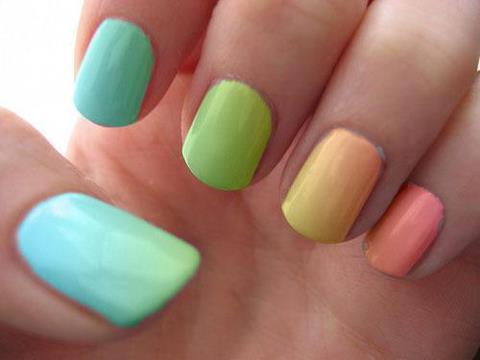 |
| The inspiration for my mani |
The picture above was the inspiration for my mani. Look how smooth and lovely these colors look together! I stumbled along this picture on my tumblr one day and reblogged it for future reference. However, no credit was given to anyone, so if you know the artist of these nails, please do tell me!
Colors Used:
Zoya - Shelby + white
Zoya - Arizona + white
China Glaze - Lemon Fizz
Essie - Navigate Her
China Glaze - Bahamian Escape
OPI - Done Out in Deco
No comments:
Post a Comment
Hey guys! If you'd like to comment, I'd love to hear what you've got to say! :)